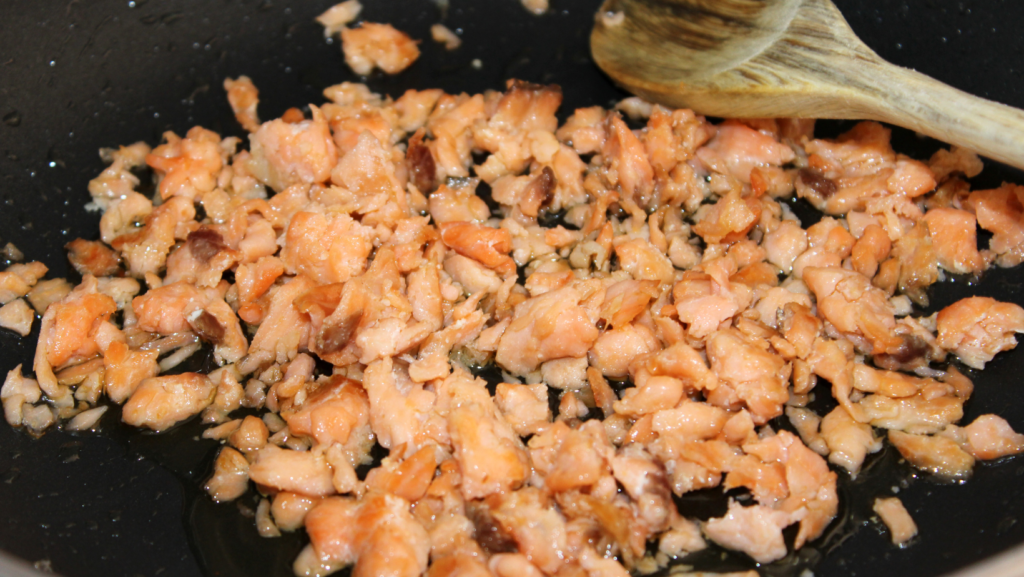
How to Cook Salmon

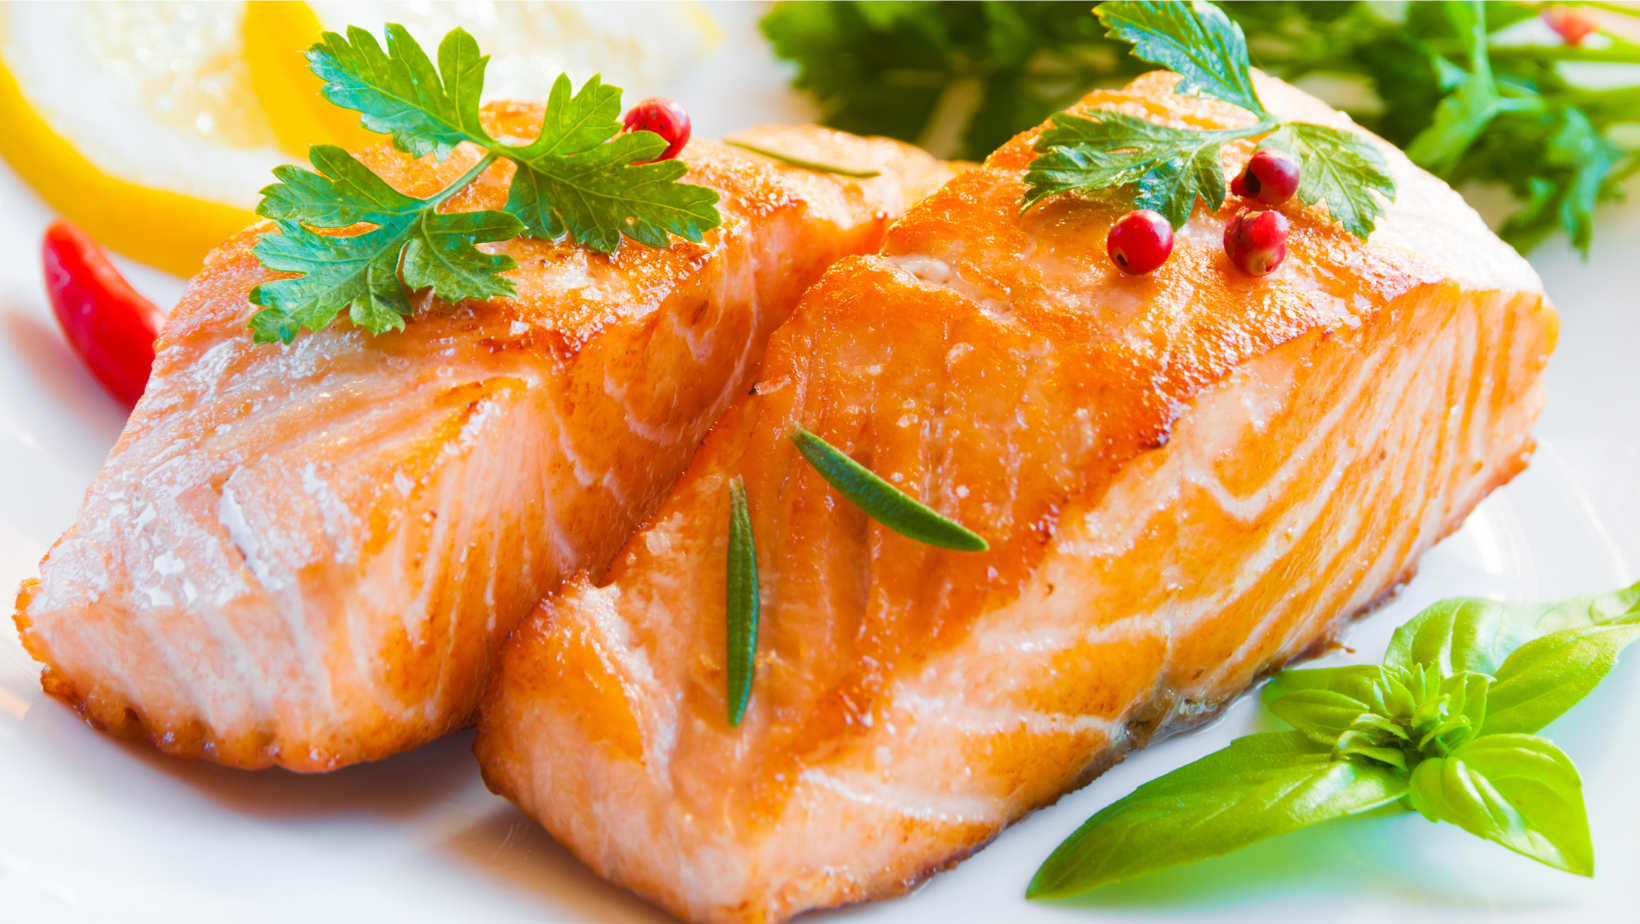
Cooking salmon is a quick and easy process that can be completed in a matter of minutes. There are several methods you can use to cook salmon, each with its own unique set of benefits. In this article, we will discuss the various methods for cooking salmon, as well as provide some tips on how to get the best results.

Baking

One of the most popular methods for cooking salmon is baking. Baking salmon allows you to cook the fish evenly, which helps to preserve its natural flavors. Additionally, baking salmon is a healthy way to cook the fish, as it does not require the use of any oils or butter. To bake salmon, preheat your oven to 350 degrees Fahrenheit. Then, place the salmon fillets on a baking sheet and bake for about 20 minutes, or until the fish is cooked through.

Grilling

Another popular method for cooking salmon is grilling. Grilling salmon provides a bit of smoky flavor to the fish that many people find irresistible. When grilling salmon, it is important to use a high-quality Salmon Grill Pan so that the fish does not stick to the grill. Additionally, you will want to make sure that the grill is preheated to a high temperature before adding the salmon. To grill salmon, simply place the fillets on the grill and cook for about 10 minutes, or until the fish is cooked through.

Pan-Frying

If you are looking for a quick and easy way to cook salmon, pan-frying may be your best option. Pan-seared salmon allows you to cook the fish quickly and easily, without having to worry about it sticking to the pan. Additionally, pan-frying gives the salmon fillet a nice crispy exterior that many people find irresistible. To pan-fry salmon, heat a small amount of oil in a frying pan over medium-high heat. Then, add the salmon fillets to the pan and cook for about 4 minutes per side, or until the fish is cooked through.

Sauteeing

Sauteeing is another quick and easy method for cooking wild salmon. When sauteeing salmon, it is important to use a non-stick skillet so that the fish does not stick to the pan. Additionally, you will want to make sure that the pan is heated to a high temperature before adding the salmon. To saute salmon, simply add the fillets to the pan and cook for about 2 minutes per side, or until the flavorful fish is cooked through.

Poaching

Poaching is a great way to cook fresh salmon if you are looking for a healthy option. Poaching salmon allows you to cook the fish without using any oils or butter. Additionally, poaching salmon helps to preserve the fish’s natural flavors. To poach salmon, add the fillets to a large skillet or saucepan filled with simmering water. Cook for about 10 minutes, or until the fish is cooked through.

Types of Salmon and Best Way To Cook

There are several different types of wild-caught salmon available on the market, each with its own unique set of flavors and textures. In this section, we will discuss the four most common types of salmon, as well as provide a recommended method for cooking each.

Atlantic Salmon

Atlantic salmon is the most popular type of farmed salmon available on the market. It has a mild flavor and a slightly flaky texture. Atlantic salmon is best cooked by baking, grilling, or pan-frying.

Coho Salmon

Coho salmon is a slightly less popular type of salmon that has a richer flavor and a firmer texture than Atlantic salmon. Coho salmon is best cooked by grilling or pan-frying.

Chinook Salmon

Chinook salmon is the largest and most flavorful type of salmon available on the market. It has pink flesh and a firm texture. Chinook salmon is best cooked by baking, grilling, or pan-frying.

Pink Salmon

Pink salmon is the smallest and weakest type of salmon available on the market. It has a mild flavor and a delicate texture. Pink salmon is best cooked by poaching or grilling.

Salmon Recipes
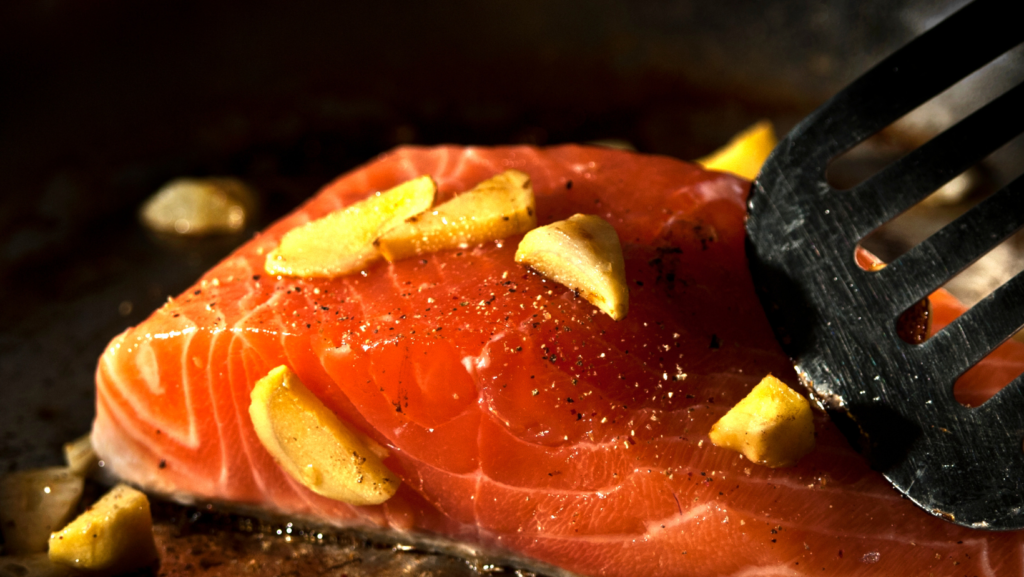
Now that you know how to cook salmon, it’s time to get cooking! In this section, we will share delicious recipes for salmon that are sure to please.

Honey Garlic Salmon Recipe

Ingredients:

  • 1 pound salmon
  • 3 cloves garlic, minced
  • 2 tablespoons honey
  • 1 tablespoon olive oil
  • Fresh lemon juice
  • Salt and pepper to taste

Instructions:

  1. Preheat the oven to 400 degrees F.
  2. In a small bowl, whisk together garlic, honey, olive oil, lemon juice, salt, and pepper.
  3. Place salmon in a baking dish and spread the honey garlic mixture over top.
  4. Bake for about 20 minutes, or until the salmon is cooked through.

Baked Salmon with Parmesan Crust

Ingredients:

  • 1 pound Atlantic salmon fillets
  • 1/4 cup grated parmesan cheese
  • 1/2 teaspoon dried oregano
  • 1/2 teaspoon garlic powder
  • Salt and pepper to taste
  • Honey
  • Olive oil

Instructions:

  1. Preheat the oven to 350 degrees Fahrenheit.
  2. In a small bowl, combine Parmesan cheese, oregano, garlic powder, salt, and pepper.
  3. Place the honey garlic salmon fillets on a baking sheet and sprinkle with the parmesan cheese mixture.
  4. Bake for about 20 minutes, or until the salmon is cooked through.

Grilled Salmon with Lemon and Dill

Ingredients:

  • 1 pound Coho salmon fillets
  • 1/4 cup freshly squeezed lemon juice
  • 2 tablespoons chopped fresh dill
  • Salt and pepper to taste

Instructions:

  1. Preheat grill to medium-high heat.
  2. In a small bowl, combine lemon juice, dill, salt, and pepper.
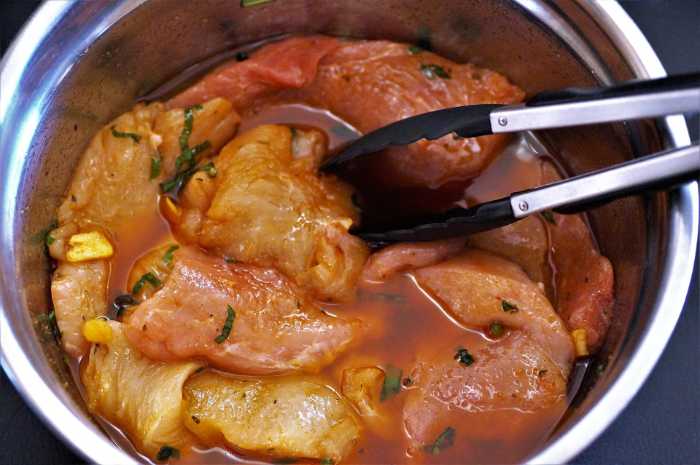
  3. Place salmon fillets in the lemon juice mixture and marinate for about 30 minutes.
  4. Grill salmon for about 10 minutes, or until the fish is cooked through.

Poached Salmon with Tomato Sauce

Ingredients:

  • 1 pound pink salmon fillets
  • 1 (15-ounce) can of tomato sauce
  • 1/4 cup white vinegar
  • 1 tablespoon sugar
  • 1 teaspoon salt
  • 1/2 teaspoon black pepper

Instructions:

  1. In a large saucepan, combine tomato sauce, vinegar, sugar, salt, and pepper.
  2. Bring the mixture to a boil over medium heat.
  3. Add the salmon fillets to the pan and cook for about 10 minutes, or until the fish is cooked through.

Best Food Pairing for Salmon

Salmon pairs well with a variety of different flavors and textures. In this section, we will discuss the four most common food pairings for salmon, as well as provide a recommended method for each.

  • Vegetables: Salmon pairs well with a variety of different vegetables. Vegetables that are typically served with salmon include broccoli, carrots, and green beans.
  • Rice: Rice is a common side dish that is served with salmon. White rice, brown rice, and wild rice are all popular choices.
  • Potatoes: Potatoes are another common side dish that is often served with salmon. Baked potatoes, mashed potatoes, and roasted potatoes are all popular choices.
  • Salad: A salad is a great way to add some color and flavor to your meal. Salmon salads are typically made with greens, such as lettuce or spinach, and topped with a variety of different toppings, such as fruits, nuts, and cheeses.

Conclusion

When it comes to cooking salmon, there are several different methods that you can use. Each method will provide its own unique flavor and texture to the fish. In this article, we have discussed four of the most popular methods for cooking salmon. These methods include baking, grilling, pan-frying, and poaching. We hope that this article has given you some insight into the best way to cook salmon.


Related Articles

10 Dehydration Symptoms

Do you often feel tired and sluggish? Do you have a headache or a dry mouth? You may be dehydrated. Dehydration is a condition that occurs when the body doesn’t have enough water to function properly. It can cause a wide variety of symptoms, which range from mild to severe. In this blog post, we will discuss 10 dehydration symptoms that you should be aware of. If you experience any of these symptoms, it’s important to drink plenty of fluids and see your doctor.

10 Dehydration Symptoms

Dehydration symptoms include:

  • Feeling thirsty
  • Dry mouth
  • Feeling tired or fatigued
  • Headaches
  • Having dark-colored urine
  • Urinating less often than usual
  • Constipation
  • Dizziness
  • Having dry skin
  • Muscle cramps

1) Feeling Thirsty

Dehydration occurs when your body does not have enough fluid to function properly. Symptoms of dehydration include feeling thirsty, tired, or lightheaded. If you are dehydrated, it is important to drink plenty of fluids and seek medical attention if your symptoms are severe.

2) Dry Mouth

When your body doesn’t have enough water, it starts to send out signs that you need to drink more. Dry mouth is one of these signs. When your mouth is dry, it can make it hard to swallow, speak, or even wear dentures. In severe dehydration, you may also get a sore throat or cracked lips. It’s important to drink before you get thirsty and to keep drinking fluids throughout the day.

3) Feeling Tired Or Fatigued

Feeling tired or fatigued is also a common symptom of moderate dehydration. When you are dehydrated, your body does not have enough water to function properly. This can lead to feelings of fatigue, as well as other symptoms such as headaches, dizziness, and lightheadedness.

4) Headaches

Most people know that headaches can be caused by mild dehydration, but they may not know how or why this happens. When the body doesn’t have enough water, it begins to function less efficiently. This can lead to a build-up of toxins in the blood, which can then cause headaches and low blood pressure. Dehydration can also cause the blood vessels to constrict, leading to increased pressure and pain. In severe cases, dehydration can also lead to seizures. So next time you have a headache, reach for a glass of water instead of a bottle of aspirin.

5) Having Dark-Colored Urine

If your urine is a dark yellow or brownish color, it may be a sign of dehydration. This is because when we are properly hydrated, our urine is typically a light yellow color. The darker the urine, the more concentrated it is. Concentrated urine can occur when we are not drinking enough fluids or if we have been sweating a lot. If you notice that your urine is dark, it is important to drink plenty of fluids to prevent dehydration.

6) Urinating Less Often Than Usual

Did you know that one of the earliest signs of dehydration is actually a decrease in the frequency of urination? That’s because when your body is dehydrated, it conserves water by reducing urine production. So if you find that you’re urinating less often than usual, it’s a good idea to have more fluid intake, especially if you’re also experiencing other symptoms of dehydration such as fatigue, headache, or dry mouth.

7) Constipation

Constipation is a common digestive issue that can cause abdominal pain, bloating, and difficulty passing stool. Though it can have many causes, one of the most common is dehydration. When the body doesn’t have enough fluids, it begins to absorb water from the intestine, making stool harder and harder to pass. In addition, dehydration can also lead to slowed gastrointestinal motility, which further contributes to constipation.

Drinking plenty of water and other fluids helps to keep the intestines hydrated and encourages normal bowel movements.

8) Dizziness

When you feel dizzy, it’s usually because your body is not getting enough fluids. Dehydration can cause your blood pressure to drop, and your brain may not be getting enough oxygen. When this happens, you may feel lightheaded, dizzy, or even faint. If you are feeling dizzy, it is important to drink plenty of fluids and consult with your doctor to rule out any underlying medical conditions.

9) Having Dry Skin

Many people don’t realize that dry skin is often a symptom of dehydration. When the body is lacking in fluids, it begins to conserve water by producing less sebum, the oily substance that helps to keep skin supple and hydrated. As a result, the skin becomes dry, cracked, and more susceptible to irritation.

10) Muscle Cramps

While muscle cramps can be caused by a variety of factors, such as overexertion or low levels of electrolytes, one of the most common causes is dehydration. When our bodies are lacking fluids, the muscles can’t function properly and begin to cramp up. So next time you feel a muscle cramp coming on, reach for a glass of water instead of a bottle of painkillers. Chances are it will do the trick!

Risk Factors

Dehydration is a serious condition that can occur when the body loses more fluids than it takes in. While dehydration can happen to anyone, there are certain risk factors that can make it more likely to occur. For instance, older adults are more at risk for dehydration because they often have chronic medical conditions that can cause dehydration, such as diabetes.

Additionally, people who are very active or who live in hot climates are also at a higher risk for dehydration. It is important to drink plenty of fluids and to avoid activities that will cause you to sweat excessively if you are at risk for dehydration.

How To Stay Hydrated

Staying hydrated is important for overall health and well-being, but it can be especially important during exercise or in hot weather. The body sweats to cool itself and this can lead to dehydration, so it’s important to replace the fluids that are lost.

  1. The best way to stay hydrated is to drink water regularly throughout the day, even when you’re not thirsty.
  2. You can also eat foods that contain water, such as fruits and vegetables.
  3. Watermelon, cucumbers, and tomatoes are all excellent choices.
  4. Make sure to drink plenty of fluids before and during exercise.
  5. Sports drinks can also help to replenish electrolytes, but water should be the mainstay of hydration.
  6. Coffee and tea count towards your daily water intake as well.
  7. Be sure to limit your intake of sugary drinks, as they can actually cause dehydration.

By following these simple tips, you can make sure you’re getting the fluids your body needs to stay healthy and function at its best.

The Ending Note

Dehydration is a common condition that can lead to a variety of symptoms, including constipation, dizziness, and dry skin. There are certain risk factors for dehydration, such as older age or living in a hot climate. The best way to stay hydrated is to drink water regularly throughout the day and to eat foods that contain water.

Related Posts:

How To Fry A Turkey Without Setting Your House On Fire

Thanksgiving is just around the corner, meaning it’s time to start thinking about how you cook your turkey. If you’re like most people, you’ll probably fry it. Frying a turkey can be a great way to get crispy skin without sacrificing the juicy meat inside. But you could easily set your house on fire if you’re not careful. In this blog post, we bring you the best deep-fried turkey recipe. Additionally, will teach you how to fry a turkey safely and without any risk of disaster!

Step by Step Guide to Frying a Turkey

If you don’t want to set your house on fire or ruin your delicious recipe when deep frying turkey, then follow the following steps;

Gather The Necessities

First, you’ll need to gather your supplies. You’ll need a turkey fryer, a propane tank, a large pot, and an oil thermometer. Read the instructions with your turkey fryer to know how much oil to use. We recommend using peanut or canola oil, as they have high smoke points and will be less likely to catch fire.

Prepare the Turkey

how to fry a turkey

Next, you’ll need to prepare your fresh turkey. Remove the giblets from the inside of the bird and rinse it off with cold water. Then, pat it dry with paper towels. You can rub the skin with spices like paprika or garlic powder. This step is optional but will help create crispy and flavorful skin. If you’re doing this for the first time, you’ll need to choose a smaller turkey. It’s ideal and easy to manage throughout the process.

Determine The Oil Level

It is ideal for you to determine the oil level sufficient for your turkey. If you’re unsure how much oil you need, try the following. Place your turkey in the cooking pot, and pour water into it until it is fully submerged. Pull it out and let all the water drain from it. Mark the level of the water, and that is the exact level of oil you should use. You might consider using peanut oil or vegetable oil.

Season Your Turkey

All you want is to make the best, tasty and juicy turkey that everyone is going to love. Once you determine the oil level, it’s time to season your turkey. You can use whatever spices you like, but we recommend using simple salt and pepper seasoning. This will help to bring out the natural flavors of the meat. It is ideal if you can season the turkey and soak it overnight. That way, you achieve the best taste. Ensure to let it dry or minimize the moisture before you can proceed to fry it.

Set Up Your Turkey Fryer In An Ideal Location

You’ll need to find a good location for your turkey fryer. First, make sure that the area is well-ventilated. You don’t want oil fumes to build up and cause a fire. Second, choose a spot that’s far away from any flammable objects like trees or buildings. Third, ensure there’s no chance of anyone knocking over the fryer. Once you’ve found the perfect location, set up your turkey fryer according to the manufacturer’s instructions.

Heat the Oil

Now it’s time to start heating the oil in a deep fryer. Place your turkey fryer on a level surface and fill it with oil according to the manufacturer’s instructions. Then, turn on the burner and heat the oil to 350 degrees Fahrenheit internal temperature. Use your oil thermometer to check the temperature of the oil, so you don’t overheat it.

Carefully Place Turkey In The Fryer

Now that your turkey fryer is all set up and ready to go, it’s time to start frying! Now it’s time to place your turkey in the fryer carefully. Slowly lower the turkey into the fryer, being careful not to touch the hot oil with your skin. Make sure that you do not splash any oil on yourself, as this could cause serious burns. Once the turkey is in the fryer, cover it with a lid and let it cook for about three minutes per pound. While you deep fry a turkey you need patience.

Remove Turkey From The Fryer

Once your turkey is cooked, carefully remove it from the electric fryer with the lid. Place it on a paper towel-lined plate to drain any excess oil. Ensure you take precautions while lifting the turkey out of the fryer. The oil is still hot and can cause burns if you’re not careful. Use oven mitts or gloves to protect your hands. Let it rest for about 20 minutes before carving. This will allow the juices to redistribute throughout the meat, making it even more delicious and protein-filled.

And that’s it! You’ve successfully fried a turkey without setting your house on fire. Now all that’s left to do is enjoy your delicious deep-fried turkey with your friends and family. And here comes the final step.

Disassembling The Turkey Fryer

Before you can even start enjoying your meal, it’s ideal for clearing things up first. Start by turning off the burner and letting the oil cool completely. Then, carefully remove the lid and drain the oil into a container. Once the oil has cooled, you can dispose of it according to local regulations. Finally, disassemble the rest of the electric turkey fryer and clean it according to the manufacturer’s instructions. And that’s it! You’re now ready to deep fry your next turkey.

Serve And Enjoy Turkey

Now that your turkey is cooked, it’s time to serve and enjoy! Carve the turkey into pieces and enjoy it with your favorite sides. We hope you enjoyed learning how to fry a turkey without setting your house on fire. You can serve it with mashed potatoes, stuffing, cranberry sauce, and gravy. And don’t forget the pumpkin pie for dessert! Make every moment of this delicious food count.

Precautions To Take When Frying Turkey

There are a few things to keep in mind when frying your turkey. First, ensure you don’t overheat the oil, as this can cause a fire. Second, be careful not to splash hot oil on yourself, as this could lead to serious burns. Finally, ensure the turkey is completely cooked before removing it from the fryer. Follow these safety measures and you’ll not end up burning your house.

Conclusion

Frying a turkey is a great way to cook it, but it’s important to be safe. Be sure to follow all the steps carefully and take precautions when handling hot oil. With these tips, you’ll be able to fry a delicious turkey without any problems. So go ahead and give it a try! Bon appetit!

How to Make Bread Pudding

Do you love bread pudding? If so, you’re in luck! In this article, we will be discussing how to make delicious and mouth-watering bread pudding. This is a dessert that everyone will love. The best part is that it’s really easy to make! We will provide you with a step-by-step guide on how to make an easy bread pudding recipe. So what are you waiting for? Start cooking!

What Is Bread Pudding?

Bread pudding is a dessert that is made with bread, milk, eggs, sugar, and spices. It is often served with a sauce or topping. The bread pudding can be either baked or steamed. It is a popular dish in many parts of the world including the United Kingdom, Ireland, Australia, New Zealand, Canada, and the United States of America.

Basic Bread Pudding Recipe

Ingredients:

  • 12 slices of sandwich bread
  • Butter or Margarine
  • Milk
  • Egg Mixture
  • Sugar
  • Vanilla extract

Directions:

Preheat the oven to 350 degrees Fahrenheit. Grease a baking dish with butter or margarine. Place the slices of bread in the dish and set them aside. In a bowl, whisk together milk, eggs, sugar, and vanilla extract. Pour this mixture over the bread in the dish. Bake for 30 minutes or until the pudding is set. Serve warm with your favorite topping. Enjoy!

Can You Freeze Bread Pudding

Cast-Iron Pan Bread Pudding Recipe

Ingredients:

  • Butter or Margarine
  • Milk Mixture
  • Eggs
  • Sugar
  • Vanilla extract

Directions:

Start by preheating the oven to 350 degrees Fahrenheit. Next, you will need to grease a cast iron pan with butter or margarine. In a bowl, whisk together milk, eggs, sugar, and vanilla extract. Pour this mixture into the pan and bake for 30 minutes or until the pudding is set. Serve warm with your favorite topping.

Whiskey-Soaked Bread Pudding Recipe

Ingredients:

  • Butter or Margarine
  • Milk
  • Eggs
  • Sugar
  • Vanilla extract

Directions:

Preheat the oven to 350 degrees Fahrenheit. Grease a baking dish with butter or margarine. Place the slices of bread in the dish and set them aside. In a bowl, whisk together milk, eggs, sugar, and vanilla extract. Pour this mixture over the bread in the dish. Bake for 30 minutes or until the pudding is set. Serve warm with your favorite topping.

Microwave Bread Pudding Recipe

Ingredients:

  • Butter or Margarine
  • Milk
  • Eggs
  • Sugar
  • Vanilla extract

Directions:

Grease a baking dish with butter or margarine. Place the slices of bread in the dish and set them aside. In a bowl, whisk together milk, eggs, sugar, and vanilla extract. Pour this mixture over the bread in the dish. Microwave for six minutes or until the pudding is set. Serve warm with your favorite topping.

Medieval Bread Pudding Recipe

Ingredients:

  • Butter or Margarine
  • Milk
  • Eggs
  • Sugar
  • Vanilla extract

Directions:

Preheat the oven to 350 degrees Fahrenheit. Grease a baking dish with butter or margarine. Place the slices of bread in the dish and set them aside. In a bowl, whisk together milk, eggs, sugar, and vanilla extract. Pour this mixture over the bread in the dish. Bake for 30 minutes or until the pudding is set. Serve warm with your favorite topping.

How To Make 3-Ingredient Bread Pudding Sauce

Improvised Savory Bread Pudding Recipe

Ingredients:

  • Butter or Margarine
  • Milk
  • Eggs
  • Sugar
  • Vanilla extract

Directions:

Preheat the oven to 350 degrees Fahrenheit. Grease a baking dish with butter or margarine. Place the slices of bread in the dish and set them aside. In a bowl, whisk together milk, eggs, sugar, and vanilla extract. Pour this mixture over the bread in the dish. Bake for 30 minutes or until the pudding is set. Serve warm with your favorite topping.

Vegan Bread Puddin Recipe

Ingredients:

  • Butter or Margarine
  • Milk
  • Eggs
  • Sugar
  • Vanilla extract

Directions:

Preheat the oven to 350 degrees Fahrenheit. Grease a baking dish with butter or margarine. Place the slices of bread in the dish and set them aside. In a bowl, whisk together milk, eggs, sugar, and vanilla extract. Pour this mixture over the bread in the dish. Bake for 30 minutes or until the pudding is set.

Frugal Bread Pudding Recipe

Ingredients:

  • Butter or Margarine
  • Milk
  • Eggs
  • Sugar
  • Vanilla extract

Directions:

Preheat the oven to 350 degrees Fahrenheit. Grease a baking dish with butter or margarine. Place the slices of bread in the dish and set them aside. In a bowl, whisk together milk, eggs, sugar, and vanilla extract. Pour this mixture over the bread in the dish. Bake for 30 minutes or until the pudding is set. Serve warm with your favorite topping.

Bread Pudding In A Bag Recipe

Ingredients:

  • Butter or Margarine
  • Milk
  • Eggs
  • Sugar
  • Vanilla extract

Directions:

Preheat the oven to 350 degrees Fahrenheit. Grease a baking dish with butter or margarine. Place the slices of bread in the dish and set them aside. In a bowl, whisk together milk, eggs, sugar, and vanilla extract. Pour this mixture over the bread in the bag and seal it tightly. Place the bag in the baking dish and bake for 30 minutes or until the french bread pudding is set.

Hardtack Bread Pudding Recipe

Ingredients:

  • Butter or Margarine
  • Milk
  • Eggs
  • Sugar
  • Vanilla extract

Directions:

Preheat the oven to 350 degrees Fahrenheit. Grease a baking dish with butter or margarine. Place the slices of bread in the dish and set them aside. In a bowl, whisk together milk, eggs, sugar, and vanilla extract. Pour this mixture over the hardtack in the dish and let it soak for 30 minutes. Bake for 30 minutes or until the pudding is set. Serve warm with your favorite topping.

Basic Bread Pudding Recipe

How To Make 3-Ingredient Bread Pudding Sauce

Ingredients:

  • Butter or margarine
  • Milk
  • Eggs
  • Sugar
  • Vanilla extract

Directions:

In a saucepan, melt the butter or margarine over low heat. Stir in milk and sugar until the sugar is dissolved. Raise the heat to medium and cook, stirring constantly, until the mixture thickens and boils. Remove from heat and stir in vanilla extract. Serve warm over challah bread pudding.

How To Make Bread Pudding Without Eggs

Ingredients:

  • Butter or margarine
  • Milk
  • Sugar
  • Vanilla extract

Directions:

Grease a baking dish with butter or margarine. Place the slices of bread in the dish and set them aside. In a saucepan, heat milk and sugar over medium heat, stirring constantly, until the mixture comes to a boil. Remove from heat and stir in vanilla extract. Pour this mixture over the bread in the dish. Bake for 30 minutes or until the pudding is set. Serve warm with your favorite topping.

Bread Pudding Tips

  • Try using different types of bread for your pudding, such as challah, brioche, or even cinnamon raisin bread cubes.
  • Experiment with different flavor combinations by adding chocolate chips, dried fruit, or nuts to your pudding before baking.
  • Leftover bread pudding can be stored in the refrigerator for up to four days. Reheat individual servings in the microwave for a quick and easy dessert.

Can You Freeze Bread Pudding?

Yes, you can freeze bread pudding. Just place the cooled pudding in a freezer-safe container and store it in the freezer for up to two months. When you’re ready to eat, thaw the pudding overnight in the refrigerator and reheat it in the oven or microwave.

Conclusion

Bread pudding is a delicious dessert that can be made in many different ways. Whether you want a traditional pudding made with milk and eggs or a vegan pudding made with plant-based milk, there’s a recipe for you. You can even make an amazing bread pudding recipe using stale bread and leftover milk. And if you’re feeling adventurous, try making bread pudding in a bag or hardtack bread pudding. No matter what recipe you choose, you’re sure to enjoy this delicious dessert!

Articles You Might Enjoy Reading

How to Make Classic Chicken and Dumplings

Nothing is more comforting than chicken and dumplings on a cold winter day. This classic dish is surprisingly easy to make, and it’s sure to please everyone at your table. But what’s the best chicken dumplings recipe? Don’t worry, and you came to the right place. This blog post will walk you through the steps of making chicken and dumplings soup from scratch. We’ll also share our favorite recipe for this delicious dish!

Chicken Dumplings Recipe: Step By Step Recipe

Here are just simple steps that you need to follow to make homemade chicken and dumplings from scratch:

Choose Your Chicken

This recipe can use chicken breasts, thighs, or whole chicken. If you use chicken breasts, cook them until they are very tender. Thighs will also work well, but they may not be as tender as chicken breasts; after choosing your chicken, clean every part carefully and place it in a pure port, ready for the next step.

Make the Dumpling

There are two types of dumplings – drop dumplings and rolled dumplings. Drop dumplings are the easiest to make, and they’re what we’ll be using for this recipe. To make dumplings, combine flour, salt, baking powder, and milk in a bowl. Then drop spoonfuls of the batter into your chicken soup.

Season Your Dumpling

After you’ve added the dumplings to the soup, it’s time to season them. We recommend using chicken bouillon, salt, and pepper. You can also add other herbs and spices if you like. Just be sure not to overdo it – a little goes a long way! Try yellow onion and dice it with a savor flavor. You can spice it more by adding two small chopped carrots and stalks of celery. Lastly, add 5 tablespoons of butter to make a flavorful chicken soup.

Briefly Boil The Chicken

After adding the chicken to the pot, bring the soup to a boil. Then reduce the heat and simmer for 30 minutes. This will help to cook the chicken all the way through. Don’t let your water boil continuously; instead, maintain a medium heat to prevent the chicken fat from infusing the chicken broth.

If you do this, the fat will float on water, so you can remove it easily later. Let the broth and chicken simmer for around 60 minutes before you can proceed to the next step.

Cool The Chicken

This is easy. Remove your cooked chicken from the pot with a slotted spoon and place it in a bowl. Once the chicken has cooled, shred it with a fork or chop it into small pieces. However, a point to note: ensure you taste your chicken to ensure it is fully cooked before you can remove it from the stove. Slice the meat with a knife to check if it is safe to consume. If it’s white, then you’re good to go.

Debone The Chicken Then Shred It

The chicken should be very tender at this point, so it should be easy to debone. Just remove the meat from the bones and shred it into small pieces. You can save the bones to make shredded chicken stock or discard them. Once done, let the chicken and the broth simmer on medium heat for a while. Make sure you don’t overcook your shredded rotisserie chicken.

Prepare Your Dumpling Mix

To make the dumpling mix, combine flour, salt, baking powder, and milk in a bowl. Then drop spoonfuls of the batter into your chicken soup. Stir slowly to make sure that everything is fully and well mixed up. Maintain a moist mix to prevent making a sticky dough.

Roll and Cut Your Dumpling Dough

After you’ve mixed the ingredients, it’s time to roll the dough. Place it on a well-floured surface and use a rolling pin to roll it out until you get about ¼ inch thick. Then use a knife or pizza cutter to cut the dough into strips. You can make them whatever size you like, but we recommend cutting them into about an inch wide strips.

Add Your Dumpling To the Broth

Once you’ve cut the dough into strips, it’s time to add them to the chicken broth. Be sure to do this slowly so that they don’t stick together. You can also drop them into the broth one at a time if you prefer. Just be sure not to overcrowd the pot. The dumplings will cook quickly, so you don’t need to let them simmer for very long. We recommend only letting them cook for about 15 minutes.

Make Your Cream

Once the dumplings are cooked, it’s time to make your chicken and homemade dumplings. To do this, add heavy cream to the pot and stir until everything is combined.

Add The Cream

Now it’s time to add your cream and seasonings. Simply add heavy cream to the pot and stir until everything is combined. You can add a pinch of salt and some pepper to taste. If you want your chicken and dumplings to be extra creamy, add some sour cream or milk. Just be sure not to boil the soup once you’ve added the cream, as this will cause it to curdle.

Serve And Enjoy!

We hope you enjoy this classic chicken and dumplings recipe. Be sure to check out our other recipes for more great meal ideas! Once everything is combined, simply ladle the chicken and dumplings into bowls and enjoy!

Do’s and Don’ts of Chicken Dumplings Recipe

Chicken dumplings are long-standing favorite comfort food in many cultures. They can be made in various ways, but the most important thing is to use fresh ingredients and cook them properly. Here are some do’s and don’ts to help you get the most out of your chicken dumpling recipe.

Do’s

  • Use fresh chicken. This is crucial for both flavor and food safety. If you’re using frozen chicken, thaw it thoroughly before cooking.
  • Use a variety of herbs and spices. Try using sage, thyme, parsley, and pepper. This will give your dumplings flavor and depth.
  • Add vegetables if need be. This is a great way to sneak in some extra nutrition. Try adding carrots, celery, and onion to your chicken dumplings.

Don’ts

  • DO NOT overcook the chicken. Cook it until it’s just done, then remove it from the heat. This will make it tough and dry.
  • Never overcrowd the pot. This will make the dumplings stick together and fall apart. Cook them in batches if necessary.
  • Don’t boil the soup once you’ve added cream or milk. This might ruin your leftover rotisserie chicken.

Conclusion

This is a delicious and easy chicken and dumplings recipe that anyone can make at home. Follow the steps outlined above to ensure that your chicken and dumplings turn out perfectly every time. And be sure to experiment with different seasonings and add-ins to find your perfect combination. You might also consider checking our other recipes for more fun and exciting dishes. Happy cooking!

Mouthwateringly Easy Apple Crisp

Fall is in the air, which means one thing: apple season! There are many delicious recipes to make with apples, but our favorite must be apple crisp. This recipe is straightforward to follow and results in a mouthwateringly delicious dessert. Here we will give you the best apple crisp recipe worth giving a shot. Give it a try for yourself and see what we mean!

Apple Crisp History

Apple crisp is a dish made with apples and a variety of toppings, including oats, butter, and brown sugar. While the exact origins of apple crisp are unknown, it is believed to have originated in the United States in the 19th century. In a cookbook called The Kentucky Housewife, Apple crisp was first mentioned in print in 1864. The dish became popular in the United States in the early 1900s and was often served at church socials and potlucks.

Apple crisps gained popularity in the early 20th century to use up excess apples from the harvest. Today, apple pie remains a popular dish, particularly in North America. You can serve apple crisp as a dessert or breakfast food and make it with various types of apples which goes well with vanilla ice cream or lemon juice. So whether you prefer apple crisp sweet or tart, there’s an Apple Crisp History for everyone!

Different Types Of Apple Crisp

recipe for apple crisp

Apple crisp is a type of dessert that typically consists of baked apples topped with a streusel-like crumble. There are many variations of apple crisp, and you can make the dish with different types of apples:

  • Apple pandowdy: Apple pandowdy is a variation of apple crisp made by layering the apples and topping them in a baking dish, then pressing the dough into the fruit. The result is a dessert with a crispy top and soft, cooked apples. So whether you prefer your apple crisp with a traditional crumb topping or a more creative twist, this delicious dessert will satisfy your sweet tooth.
  • Apple Brown Betty: Apple crisps come in many different forms, each with a unique flavor and texture. One of the most classic apple crisps is Apple Brown Betty. This dish is made by layering thinly sliced apples with a mixture of bread crumbs, sugar, and butter. The result is a sweet and rich apple crisp that is perfect for a cold winter’s day. 
  • Apple cobbler: This makes a perfect apple mixture. is made with a fruit filling thickened with flour or cornstarch. The filling is placed in an oven-safe dish and topped with biscuits or pie dough. You can also bake apple cobbler until the topping is golden brown and the filling is bubbly. Apple cobbler can be served warm or at room temperature.
  • Apple buckle: You make an apple buckle by combining apples with sugar, cinnamon, and nutmeg. The mixture is then spread into a baking dish and topped with a batter made of flour, sugar, butter, eggs, and baking powder.
  • Apple crumbles: Apple crumbles are a dessert that typically consists of a layer of apples covered with a crumb topping. You make the topping from a mixture of flour, sugar, butter, and spices.

Select Your Apples

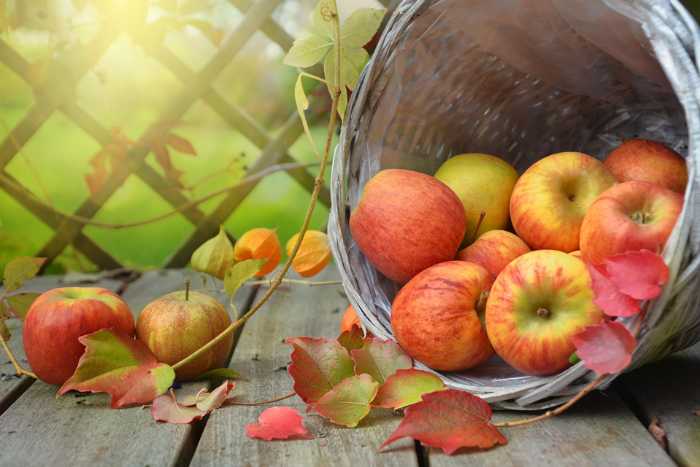
For best results, choose apples that are firm and well-ripened. You can make crisps with a mix of sweet and tart apples. However, depending on your preferences, you can use all sweet or tart apples. For a tart apple crisp, try:

Granny Smith Apples

Granny Smith apples are the best type of apple to use for an apple crisp. They are tart and firm, with a thick skin that helps them hold up during cooking. Granny Smiths also have a high sugar content, which means they will caramelize nicely during baking.

Golden Delicious Apples

Golden Delicious apples are incredibly juicy, making the filling nice and moist. Unfortunately, they also have a slightly tart flavor offset perfectly by the sweetness of the sugar and cinnamon in the topping. Golden Delicious apples also hold their shape well when cooked, so you don’t have to worry about them turning mush.

Fuji and Gala Apples

Fuji and Gala’s apples are the best apples for an apple crisp. Fuji apples are crisp and have a sweetness that is well balanced with their acidity. They also have a light floral aroma. Gala apples are also crisp, but they are less tart than Fuji apples and have a sweetness reminiscent of honey.

In addition, Gala apples have a slightly adhesive texture that helps them hold together in a pie or crisp. Mix Fuji and Gala apples in your apple crisp recipe for the best results. It will give you the perfect balance of sweetness, acidity, and texture.

No matter what type of apple you choose, slice them thinly, so they cook evenly. With these tips in mind, you’ll be sure to choose the best apples for your next apple crisp!

Try Using Butter

While most apple crisp recipes call for margarine or vegetable shortening, butter is the best choice if you want a rich and flavorful crisp. Butter adds a depth of flavor to the dish that you can’t match with margarine or vegetable shortening. In addition, butter helps to create a crisp topping that is golden brown and flaky. For these reasons, butter is the best choice for an apple crisp recipe.

Oats Are A Good Option

Oats are a good option for an easy apple crisp because they provide a variety of nutrients and are a good source of fiber. Oats can also help regulate blood sugar levels, which is essential for people with diabetes. In addition, oats are low in calories and fat, making them a healthy choice for people trying to lose weight.

The Ingredients And Preparations

A classic apple crisp is one of the easiest desserts you can make. This mouthwatering dessert is perfect for a fall potluck or an after-dinner treat. The best part is that it only takes a few minutes to put together. Start by preheating your oven to 375 degrees.

Then, butter a 9×13 inch baking dish and set it aside. Next, peel and slice about 6 cups of apples. I like to mix Granny Smith and Honeycrisp apples, but you can use any apple you like. Once the apples are peeled and sliced, mix them with ¾ cup of sugar, one tablespoon of flour, one teaspoon of cinnamon, and a pinch of salt.

Pour the mixture into the prepared baking dish and set it aside. To make the crisp topping, mix 1 cup of oats, 1 cup of flour, ¾ cup of brown sugar, one teaspoon of cinnamon, and ½ cup of melted butter.

Once the ingredients are combined, sprinkle the topping over the apples. Bake the crisp for about 45 minutes or until the top is golden brown. Serve warm with a dollop of whipped cream or ice cream. Enjoy!

Topping Ideas

There are a few ways you can change up the topping on your apple crisp. One way is to add chopped nuts, such as pecans or walnuts. Another option is to use a streusel topping instead of an oat topping. To make a streusel topping, mix ¾ cup of flour, ½ cup of sugar, and ½ cup of butter.

Once the ingredients are combined, sprinkle the streusel over the apples before baking. You can also add a layer of caramel sauce or chocolate chips to the top of your crisp before serving. Whatever toppings you choose, be sure to enjoy this delicious dessert!

Conclusion

An apple crisp is a delicious and easy dessert to make. Be sure to choose the best apples for your recipe, use butter for a rich flavor, and add oats for various nutrients. Top with streusel, caramel sauce, or chocolate chips before serving. Enjoy!

How to Make Amazing Shepherd’s Pie

Shepherd’s pie is a classic English dish that is usually made with ground lamb or beef. But you can make it with any kind of meat, or even vegetarian-friendly ingredients. This hearty dish is perfect for cold winter nights, and it’s easy to make too!

Just follow these simple steps and you’ll have a delicious and satisfying meal everyone will love.

Also read: 10 THINGS TO KNOW ABOUT HEPATITIS A (SYMPTOMS, CAUSES, AND MORE)

History Of Shepherd’s Pie

Shepherd’s pie is a classic English dish that has been around for centuries. There are many different theories about where it came from, but most people believe it was originally created by shepherds in the Scottish Highlands. They would take the leftovers from their lamb dinner and mash them together with some potatoes to create a delicious and filling pie.

But you can make it with any kind of meat, or even vegetarian-friendly ingredients. This dish is suitable for cold winter nights, and it’s very easy to make to it.

Image credits: Pixabay.com

Different Variations Of Shepherd’s Pie

There are many different variations of shepherd’s pie, and the recipe can be adapted to fit any taste. You can make it with ground lamb or beef, or you can use other types of meat like chicken or turkey. You can also add different vegetables, like peas, corn, or carrots. And for a vegetarian version, you can simply leave out the meat and add more vegetables instead.

There are many different ways you can make shepherd’s pie. Here are a few ideas:

  • Try using different kinds of meat, such as lamb, chicken, or turkey.
  • Experiment with different vegetables, such as corn or green beans.
  • Make a vegetarian version by using lentils or black beans in place of the meat.
  • Try different toppings, such as shredded cheese, sour cream, or green onions.

Also read: FOODS THAT CAUSE CANCER

How to Make Shepherd’s Pie Step-by-Step

Shepherd’s pie is actually quite easy to make, and it’s a perfect dish for a winter night. Just follow these simple steps and you’ll have a delicious meal everyone will love.

To make shepherd’s pie, you will first need the following ingredients:

  • 1 lb ground lamb or beef
  • 1 large chopped onions
  • 2 cloves garlic, minced
  • 3 carrots, peeled and diced
  • 1 tbsp tomato paste
  • 2 tsp rosemary, minced
  • 1 tsp thyme, minced
  • 1/2 cup beef or chicken broth
  • 1 tbsp flour
  • 1 cup frozen peas
  • 4 large potatoes, peeled and diced
  • 1/4 cup milk
  • 3 tbsp melted butter
  • Salt and pepper, to taste

Once you have all the above ingredients, follow this procedure step by step.

Preheat Your Oven

You’ll want your oven nice and hot before you start cooking, so preheat it to 350 degrees Fahrenheit.

Start Cooking Your Meat

Image credits: Unsplash.com

In a large skillet, cook your meat over medium heat until it’s browned and cooked through. If you’re using ground beef, you’ll want to drain off any excess fat. Once it’s ready, add ground beef mixture to other ingredients.

Add The Vegetables And Seasonings

Once the meat is cooked, add the chopped vegetables and any seasonings you want to use. Common seasonings include salt, pepper, thyme, and rosemary. Give everything a good stir and let the meat mixture cook for a few minutes.

Pour The Mixture Into A Baking Dish

Once everything is cooked, transfer the mixture into a baking dish. If you’re using a pie dish, you can just spread the mixture in. If you’re using a casserole dish, you may want to spread it out evenly and then press it down into the dish.

Also read: FOODS THAT CAUSE CANCER

Top With Mashed Potatoes

Image credits: Unsplash.com

Now it’s time to add the mashed potatoes. Spread them over the top of the meat and vegetable mixture, and then use a fork to create little ridges. This will help the potatoes brown nicely in the oven.

Bake In The Oven

Bake the shepherd’s pie in the preheated oven for 30 minutes, or until the potatoes are golden brown. Let it cool for a few minutes before serving, and enjoy!

There you have it! A delicious and easy-to-make shepherd’s pie that is sure to please everyone. Be sure to experiment with different kinds of meats and vegetables to find your perfect combination. And if you’re feeling really adventurous, try making a vegetarian version.

Tips On How To Make The Perfect Shepherd’s Pie                                   

There are a few things you can do to make sure your shepherd’s pie turns out perfect every time. First, be sure to brown the meat well before adding it to the dish. This will give it a nice flavor and prevent it from being dry.

Second, add plenty of vegetables. Peas and carrots are classic choices, but feel free to experiment with other vegetables like corn or green beans. Finally, top the pie with mashed potatoes. Be sure to spread them evenly and smooth them out for the perfect finish.

If you have any shepherd’s pie leftovers or leftover mashed potatoes, don’t worry! They reheat well and make a great lunch the next day. Just pop them in the microwave or oven and enjoy!

Also read: 15 FOODS SUITABLE FOR THE DIABETIC DIET

Frequently Asked Questions (FAQs)

Q: Why does my shepherd pie keep falling apart?

A: If your shepherd pie keeps falling apart, it is likely because the potatoes are not thick enough. Be sure to add plenty of mashed potatoes to the top of the pie, and spread them out evenly. You can also try using a thicker type of potatoes, such as Yukon Gold or Russet. Finally, make sure you bake the pie long enough so that the potatoes have a chance to brown and firm up. If you find that your pie is still falling apart, try covering it with foil and baking for an additional 10-15 minutes.

Q: How can I fix my runny shepherd’s pie?

A: If your shepherd’s pie is runny, it is likely because the gravy did not thicken properly. Be sure to use a thickening agent, such as cornstarch or flour, when making the gravy. You can also try cooking the gravy for a longer period of time so that it has a chance to reduce and thicken. If your pie is still runny, you can try spooning off some of the gravy before serving.

Conclusion

Shepherd’s pie is a delicious and easy-to-make dish that is perfect for cold winter nights. Just follow these simple steps and you’ll have a hearty and satisfying meal everyone will love.

Don’t forget to try out some of the different variations of shepherd’s pie, and feel free to share your own recipes in the comments section.